打包前后端分离项目
2024年1月21日大约 4 分钟约 821 字
准备-后端SpringBoot项目
创建项目

创建Controller
src/main/java/com/lzw/testjartoexeback/controller/HelloController.java
package com.lzw.testjartoexeback.controller;

import org.springframework.web.bind.annotation.GetMapping;
import org.springframework.web.bind.annotation.RestController;

@RestController
@RequestMapping("/api")
public class HelloController {
    @GetMapping("/hello")
    public String hello() {
        return "Hello World";
    }
}
配置跨域(需要的话)
src/main/java/com/lzw/testjartoexeback/config/WebConfig.java
package com.lzw.testjartoexeback.config;

import org.springframework.context.annotation.Configuration;
import org.springframework.web.servlet.config.annotation.CorsRegistry;
import org.springframework.web.servlet.config.annotation.WebMvcConfigurer;

@Configuration
public class WebConfig implements WebMvcConfigurer {

    @Override
    public void addCorsMappings(CorsRegistry registry) {
        registry.addMapping("/**").allowedOrigins("http://localhost:8888"); // 前端Vue应用的8888
    }
}
pom.xml
<?xml version="1.0" encoding="UTF-8"?>
<project xmlns="http://maven.apache.org/POM/4.0.0" xmlns:xsi="http://www.w3.org/2001/XMLSchema-instance"
         xsi:schemaLocation="http://maven.apache.org/POM/4.0.0 https://maven.apache.org/xsd/maven-4.0.0.xsd">
    <modelVersion>4.0.0</modelVersion>
    <parent>
        <groupId>org.springframework.boot</groupId>
        <artifactId>spring-boot-starter-parent</artifactId>
        <version>3.2.2</version>
        <relativePath/> <!-- lookup parent from repository -->
    </parent>
    <groupId>com.lzw</groupId>
    <artifactId>test-jar-to-exe-back</artifactId>
    <version>0.0.1-SNAPSHOT</version>
    <name>test-jar-to-exe-back</name>
    <description>test-jar-to-exe-back</description>
    <properties>
        <java.version>17</java.version>
    </properties>
    <dependencies>
        <dependency>
            <groupId>org.springframework.boot</groupId>
            <artifactId>spring-boot-starter</artifactId>
        </dependency>

        <dependency>
            <groupId>org.springframework.boot</groupId>
            <artifactId>spring-boot-starter-web</artifactId>
        </dependency>

        <dependency>
            <groupId>org.springframework.boot</groupId>
            <artifactId>spring-boot-starter-test</artifactId>
            <scope>test</scope>
        </dependency>

    </dependencies>

    <build>
        <plugins>
            <plugin>
                <groupId>org.springframework.boot</groupId>
                <artifactId>spring-boot-maven-plugin</artifactId>
            </plugin>
        </plugins>
    </build>

</project>
applcation.yaml
server:
  port: 9999
启动后端项目

准备-前端Vue项目
创建项目
创建一个Vue项目(安装element-plus)
vue create test-jar-to-exe-front
npm install element-plus --save
npm install axios
具体可参考 Vue项目搭建示例文档
创建组件
src\views\Hello.vue
<template>
    <div>
      <el-button type="primary" @click="fetchMessage">Get Hello World</el-button>
      <el-alert v-if="message" :title="message" type="success"></el-alert>
    </div>
  </template>

  <script>
  import axios from 'axios';
  import { ElButton, ElAlert } from 'element-plus';

  export default {

    components: {
      ElButton,
      ElAlert
    },
    data() {
      return {
        message: ''
      };
    },
    methods: {
      fetchMessage() {
        axios.get('http://localhost:9999/api/hello') // 和后端配置的端口对应
          .then(response => {
            this.message = response.data;
          })
          .catch(error => {
            console.error("There was an error!", error);
          });
      }
    }
  };
  </script>
修改路由
src\router\index.js
import { createRouter, createWebHistory } from 'vue-router'
import HomeView from '../views/HomeView.vue'
import Hello from '../views/Hello.vue'

const routes = [
  {
    path: '/',
    name: 'home',
    component: HomeView
  },
  {
    path: '/about',
    name: 'about',
    // route level code-splitting
    // this generates a separate chunk (about.[hash].js) for this route
    // which is lazy-loaded when the route is visited.
    component: () => import(/* webpackChunkName: "about" */ '../views/AboutView.vue')
  },
  {
    path: '/hi',
    name: 'hi',
    component: Hello
  }
]

const router = createRouter({
  history: createWebHistory(process.env.BASE_URL),
  routes
})

export default router
修改main.js
src\main.js
import { createApp } from 'vue'
import App from './App.vue'
import router from './router'
import store from './store'
import ElementPlus from 'element-plus';
import 'element-plus/dist/index.css';

createApp(App).use(store).use(router).use(ElementPlus).mount('#app')
配置跨域和静态文件路径
vue.config.js
const { defineConfig } = require('@vue/cli-service')
module.exports = defineConfig({
  transpileDependencies: true,
  devServer:{
    port:8888, // 启动端口
    proxy:{
      '/hello':{
        target: 'http://localhost:9999', // SpringBoot应用的URL
        changeOrigin: true
      }
    }
  }
})
修改App
src\App.vue
<template>
  <nav>
    <router-link to="/">Home</router-link> |
    <router-link to="/about">About</router-link>
    <br>
    <router-link to="/hi">Hi</router-link>
  </nav>
  <router-view/>
</template>

<style>
#app {
  font-family: Avenir, Helvetica, Arial, sans-serif;
  -webkit-font-smoothing: antialiased;
  -moz-osx-font-smoothing: grayscale;
  text-align: center;
  color: #2c3e50;
}

nav {
  padding: 30px;
}

nav a {
  font-weight: bold;
  color: #2c3e50;
}

nav a.router-link-exact-active {
  color: #42b983;
}
</style>
启动前端项目
npm run serve访问主页,点击Hi
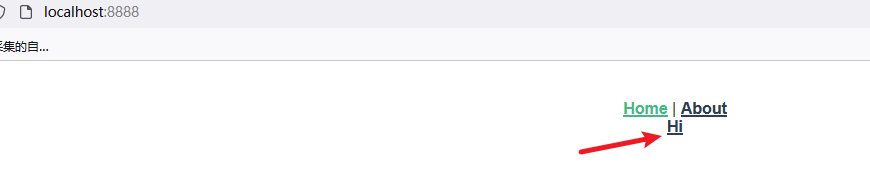
点击蓝色按钮,即可返回数据

打包前端项目
npm run build打包的产出目录是dist

整合前后端
把dist里面的文件复制到sb项目的resources中的static目录中
可参考 静态资源访问文档

启动后端项目
访问index.html出现以下即可

点击 Hi,再点击按钮

以上图片说明成功了。
打jar包
先把test叉掉,再进行 package

运行jar包
