Docker安装各组件
Docker Compose
pip install docker-compose
如果 403 可以换下面这个
pip install docker-compose -i https://mirrors.aliyun.com/pypi/simple
Registry
使用Docker-compose安装 Registry以及其可视化
version: '3.3'

services:
  registry-ui:
    image: joxit/docker-registry-ui:latest
    restart: always
    ports:
      - 8080:80
    environment:
      - SINGLE_REGISTRY=true
      - REGISTRY_TITLE=Docker Registry UI
      - DELETE_IMAGES=true
      - SHOW_CONTENT_DIGEST=true
      - NGINX_PROXY_PASS_URL=http://registry-server:5000
      - SHOW_CATALOG_NB_TAGS=true
      - CATALOG_MIN_BRANCHES=1
      - CATALOG_MAX_BRANCHES=1
      - TAGLIST_PAGE_SIZE=100
      - REGISTRY_SECURED=false
      - CATALOG_ELEMENTS_LIMIT=1000
    container_name: registry-ui

  registry-server:
    image: registry:latest
    restart: always
    ports:
      - 5000:5000
    environment:
      REGISTRY_HTTP_HEADERS_Access-Control-Origin: '["*"]'
      REGISTRY_HTTP_HEADERS_Access-Control-Allow-Methods: '[HEAD,GET,OPTIONS,DELETE]'
      REGISTRY_HTTP_HEADERS_Access-Control-Credentials: '[true]'
      REGISTRY_HTTP_HEADERS_Access-Control-Allow-Headers: '[Authorization,Accept,Cache-Control]'
      REGISTRY_HTTP_HEADERS_Access-Control-Expose-Headers: '[Docker-Content-Digest]'
      REGISTRY_STORAGE_DELETE_ENABLED: 'true'
    volumes:
      - /data/registry:/var/lib/registry
    container_name: registry-server
启动
docker-compose up -d

# 取消
docker-compose down
htpasswd -Bbn admin 123456 > /opt/auth/passwd
修改Docker Daemon的配置文件,文件位置为/etc/docker/daemon.json,由于Docker默认使用HTTPS推送镜像,而我们的镜像仓库没有支持,所以需要添加如下配置,改为使用HTTP推送
vim /etc/docker/daemon.json

# ##########  registry-mirrors 这个是容器镜像加速的
{
  "registry-mirrors": ["https://1z6kznch.mirror.aliyuncs.com"],
  "insecure-registries":["172.16.13.113:5000"]
}
######################
systemctl daemon-reload && systemctl restart docker
假设有一个镜像127.0.0.1:5000/test:1.0,上传
docker push 127.0.0.1:5000/test:1.0# 通过curl查看
curl 127.0.0.1:5000/v2/_catalog
{"repositories":["test"]}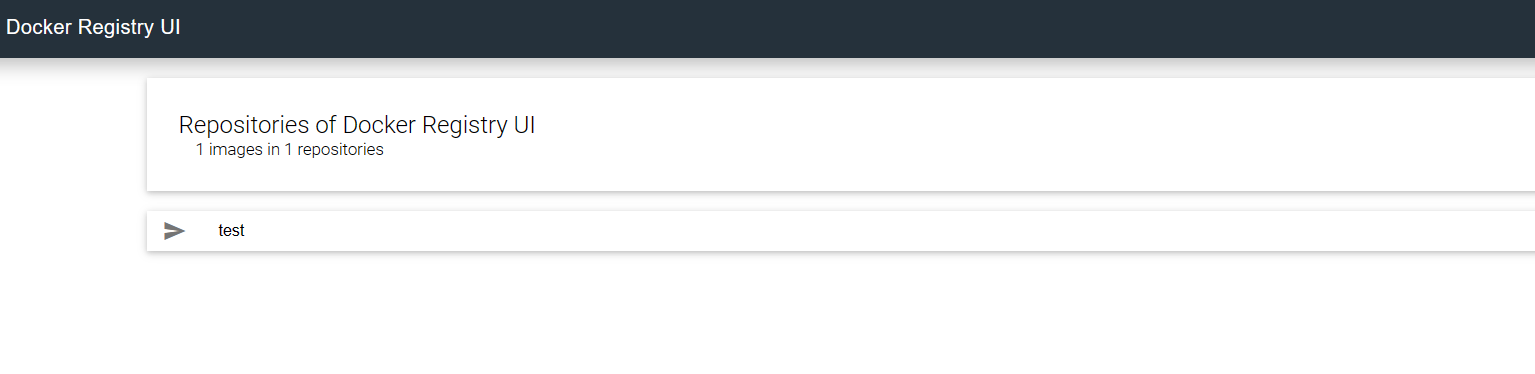
Harbor
https://zhuanlan.zhihu.com/p/638376379
安装
前置:安装docker-compose
内核参数修改:br_netfilter模块用于将桥接流量转发至iptables链,br_netfilter内核参数需要开启转发。
root@ubuntu:/opt/harbor# modprobe br_netfilter
root@ubuntu:/opt/harbor# cat > /etc/sysctl.d/docker.conf <<EOF
> net.bridge.bridge-nf-call-ip6tables = 1
> net.bridge.bridge-nf-call-iptables = 1
> net.ipv4.ip_forward = 1
> EOF
为Harbor自签发证书
root@ubuntu:/opt/harbor# mkdir /data/ssl -p
root@ubuntu:/opt/harbor# cd /data/ssl
# 生成一个3072位的key,也就是私钥
root@ubuntu:/data/ssl# openssl genrsa -out ca.key 3072
Generating RSA private key, 3072 bit long modulus (2 primes)
.......................................................................................++++
.......................................................................++++
e is 65537 (0x010001)

#生成一个数字证书ca.pem,3650表示证书的有效时间是3年,按箭头提示填写即可,没有箭头标注的为空:
root@ubuntu:/data/ssl# openssl req -new -x509 -days 3650 -key ca.key -out ca.pem
You are about to be asked to enter information that will be incorporated
into your certificate request.
What you are about to enter is what is called a Distinguished Name or a DN.
There are quite a few fields but you can leave some blank
For some fields there will be a default value,
If you enter '.', the field will be left blank.
-----
Country Name (2 letter code) [AU]:CH
State or Province Name (full name) [Some-State]:BJ
Locality Name (eg, city) []:BJ
Organization Name (eg, company) [Internet Widgits Pty Ltd]:
Organizational Unit Name (eg, section) []:
Common Name (e.g. server FQDN or YOUR name) []:
Email Address []:

##### 生成域名的证书
root@ubuntu:/data/ssl# openssl genrsa -out harbor.key  3072
Generating RSA private key, 3072 bit long modulus (2 primes)
..............++++
........................................................++++
e is 65537 (0x010001)
root@ubuntu:/data/ssl# openssl req -new -key harbor.key -out harbor.csr
You are about to be asked to enter information that will be incorporated
into your certificate request.
What you are about to enter is what is called a Distinguished Name or a DN.
There are quite a few fields but you can leave some blank
For some fields there will be a default value,
If you enter '.', the field will be left blank.
-----
Country Name (2 letter code) [AU]:CH
State or Province Name (full name) [Some-State]:BJ
Locality Name (eg, city) []:BJ
Organization Name (eg, company) [Internet Widgits Pty Ltd]:
Organizational Unit Name (eg, section) []:
Common Name (e.g. server FQDN or YOUR name) []:lzw-ubuntu-crawl  # lzw-ubuntu-crawl是主机名
Email Address []:

Please enter the following 'extra' attributes
to be sent with your certificate request
A challenge password []:
An optional company name []:

##### 签发证书
root@ubuntu:/data/ssl# openssl x509 -req -in harbor.csr -CA ca.pem -CAkey ca.key -CAcreateserial -out harbor.pem -days 3650
Signature ok
subject=C = CH, ST = BJ, L = BJ, O = Internet Widgits Pty Ltd, CN = lzw-ubuntu-crawl
Getting CA Private Key
# 安装Harbor
root@ubuntu:/data/ssl# cd /opt
root@ubuntu:/opt# wget https://github.com/goharbor/harbor/releases/download/v2.8.2/harbor-offline-installer-v2.8.2.tgz
# 解压包,并修改配置文件
root@ubuntu:/opt# tar xvf harbor-offline-installer-v2.8.2.tgz
root@ubuntu:/opt# cd harbor && cp harbor.yml.tmpl harbor.yml
root@ubuntu:/opt/harbor# vim harbor.yml
# 要修改的部分
hostname: lzw-ubuntu-crawl # hostname
certificate: /data/ssl/harbor.pem # certificate
private_key: /data/ssl/harbor.key # private_key
##########################
# 安装harbor
root@ubuntu:/opt/harbor# ./install.sh
✔ ----Harbor has been installed and started successfully.----
dock
# 查看harbor服务状态
root@ubuntu:/opt/harbor# docker-compose ps
/usr/local/lib/python3.8/dist-packages/requests/__init__.py:102: RequestsDependencyWarning: urllib3 (1.26.15) or chardet (5.1.0)/charset_normalizer (2.0.12) doesn't match a supported version!
warnings.warn("urllib3 ({}) or chardet ({})/charset_normalizer ({}) doesn't match a supported "
Name Command State Ports
------------------------------------------------------------------------------------------------------------------------------------------------
harbor-core /harbor/entrypoint.sh Up (healthy)
harbor-db /docker-entrypoint.sh 13 Up (healthy)
harbor-jobservice /harbor/entrypoint.sh Up (healthy)
harbor-log /bin/sh -c /usr/local/bin/ ... Up (healthy) 127.0.0.1:1514->10514/tcp
harbor-portal nginx -g daemon off; Up (healthy)
nginx nginx -g daemon off; Up (healthy) 0.0.0.0:80->8080/tcp,:::80->8080/tcp, 0.0.0.0:443->8443/tcp,:::443->8443/tcp
redis redis-server /etc/redis.conf Up (healthy)
registry /home/harbor/entrypoint.sh Up (healthy)
registryctl /home/harbor/start.sh Up (healthy)直接访问ip https://172.16.13.113/(会提示风险,很正常)  默认账号:admin 密码:Harbor12345
测试使用harbor私有镜像仓库
创建一个名为:python-crawl-vul 的项目
root@ubuntu:/opt/harbor#  vim /etc/docker/daemon.json
{
  "registry-mirrors": ["https://1z6kznch.mirror.aliyuncs.com"],
  "insecure-registries":["172.16.13.113","lzw-ubuntu-crawl"]
}
root@ubuntu:/opt/harbor# systemctl daemon-reload && systemctl restart docker

root@lzw-ubuntu-crawl:/opt/harbor# docker login 172.16.13.113
Username: admin
Password: Harbor12345
WARNING! Your password will be stored unencrypted in /root/.docker/config.json.
Configure a credential helper to remove this warning. See
https://docs.docker.com/engine/reference/commandline/login/#credentials-store


# 打tag, 已经有127.0.0.1:5000/test:1.0
root@lzw-ubuntu-crawl:/opt/harbor# docker tag 127.0.0.1:5000/test:1.0 172.16.13.113/python-crawl-vul/test:1.0
root@lzw-ubuntu-crawl:/opt/harbor# docker push 172.16.13.113/python-crawl-vul/test:1.0
Redis
redis数据目录 /data2/redis/data 配置文件目录 /data2/redis/redis.conf redis.conf文件内容如下
# bind 192.168.1.100 10.0.0.1
 # bind 127.0.0.1 ::1
 #bind 127.0.0.1

 protected-mode no
 port 6379
 tcp-backlog 511
 requirepass XZO17XoNhe@MPkXG
 timeout 0
 tcp-keepalive 300
 daemonize no
 supervised no
 pidfile /var/run/redis_6379.pid
 loglevel notice
 logfile ""
 databases 30
 always-show-logo yes
 save 900 1
 save 300 10
 save 60 10000
 stop-writes-on-bgsave-error yes
 rdbcompression yes
 rdbchecksum yes
 dbfilename dump.rdb


 dir ./
 replica-serve-stale-data yes
 replica-read-only yes
 repl-diskless-sync no
 repl-disable-tcp-nodelay no
 replica-priority 100
 lazyfree-lazy-eviction no
 lazyfree-lazy-expire no
 lazyfree-lazy-server-del no
 replica-lazy-flush no
 appendonly yes
 appendfilename "appendonly.aof"
 no-appendfsync-on-rewrite no
 auto-aof-rewrite-percentage 100
 auto-aof-rewrite-min-size 64mb
 aof-load-truncated yes
 aof-use-rdb-preamble yes
 lua-time-limit 5000
 slowlog-max-len 128
 notify-keyspace-events ""
 hash-max-ziplist-entries 512
 hash-max-ziplist-value 64
 list-max-ziplist-size -2
 list-compress-depth 0
 set-max-intset-entries 512
 zset-max-ziplist-entries 128
 zset-max-ziplist-value 64
 hll-sparse-max-bytes 3000
 stream-node-max-bytes 4096
 stream-node-max-entries 100
 activerehashing yes
 hz 10
 dynamic-hz yes
 aof-rewrite-incremental-fsync yes
 rdb-save-incremental-fsync yes
启动命令 docker run --restart=always --log-opt max-size=100m --log-opt max-file=2 -p 6379:6379 --name myredis -v /data2/redis/redis.conf:/etc/redis/redis.conf -v /data2/redis/data:/data -d redis redis-server /etc/redis/redis.conf --appendonly yes --requirepass XZO17XoNhe@MPkXG 进入redis容器
docker exec -it ad06f699fde9 redis-cli
 127.0.0.1:6379> get s1
 (error) NOAUTH Authentication required.
需要输入密码
127.0.0.1:6379> auth XZO17XoNhe@MPkXG
 OK
 127.0.0.1:6379> get s1
 (nil)
MinIO
web访问 http://42.236.73.237:9000/
安装步骤
docker pull minio/minio创建目录,用于挂载
[root@kuaizhao minio]# mkdir config
[root@kuaizhao minio]# mkdir data
[root@kuaizhao minio]# ls
config  data
[root@kuaizhao minio]# pwd
/home/minio
# 开放端口
firewall-cmd --zone=public --add-port=9000/tcp --permanent
firewall-cmd --zone=public --add-port=9001/tcp --permanent
# 重启
firewall-cmd --reload
# 查看开放的端口
firewall-cmd --zone=public --list-ports创建
docker run -p 9000:9000 -p 9001:9001 \
     --name minio \
     -d --restart=always \
     -e "MINIO_ROOT_USER=admin" \
     -e "MINIO_ROOT_PASSWORD=pingzikeji@10086" \
     -v /home/minio/data:/data \
     -v /home/minio/config:/root/.minio \
     minio/minio server /data --console-address ":9001"
访问
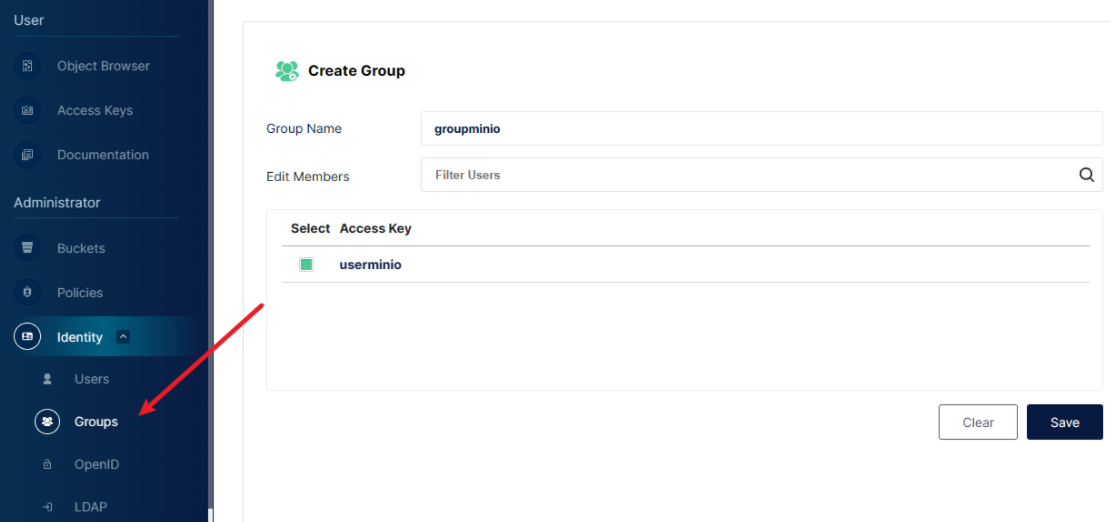
创建用户
创建组
创建key 

{"url":"http://127.0.0.1:9000","accessKey":"71qDmWxxxxxxxxx","secretKey":"Vgrxxxxxxxxxxxxxxxxxxxxxxxxxx","api":"s3v4","path":"auto"}MySQL
8.0.27版本
docker pull mysql


docker run -it -d --name mysql -p 3306:3306 --restart unless-stopped \
-m 500m -v /opt/mysql/data:/var/lib/mysql \
-v /opt/mysql/config:/etc/mysql/conf.d  \
-e MYSQL_ROOT_PASSWORD=liangzhiwei \
-e TZ=Asia/Shanghai mysql:8.0.27


# 修改密码
mysql -uroot -p 直接回车没密码
## https://blog.csdn.net/wolf131721/article/details/93004013
use mysql;
update user set authentication_string='' where user='root';--将字段置为空
ALTER user 'root'@'localhost' IDENTIFIED BY '123456';--修改密码为123456


# 配置远程连接
## https://blog.csdn.net/sinat_41721615/article/details/99417075
update user set host='%' where user ='root'; # '%'表示允许任意IP地址进行访问
FLUSH PRIVILEGES;
GRANT ALL PRIVILEGES ON *.* TO 'root'@'%'WITH GRANT OPTION; # 执行授权语句
MongoDB
安装5.0以上可能会出错
WARNING: MongoDB 5.0+ requires a CPU with AVX support, and your current system does not appear to have that! see https://jira.mongodb.org/browse/SERVER-54407 see also https://www.mongodb.com/community/forums/t/mongodb-5-0-cpu-intel-g4650-compatibility/116610/2 see also https://github.com/docker-library/mongo/issues/485#issuecomment-891991814docker pull mongo:4.4.6
docker run -d --restart=always -p 27017:27017 --name mongodb -v /opt/mongodb/db:/data/db -d mongo:4.4.6
# 设置用户名密码
mongo # 进入mongodb数据库
db.createUser(
{
user: "admin",
pwd: "123456",
roles: [ { role: "userAdminAnyDatabase", db: "admin" }, "readWriteAnyDatabase" ]
}
)
exit
# 启用认证
apt update
apt install vim
vim mongod.conf.orig
############
security:
authorization: enabled
############
# 退出容器,然后重启